As a reliable supplier of IBC DN50 Welded Ball Valves, I understand that there may come a time when the ball inside the valve needs to be replaced. This could be due to wear and tear, damage from the substances flowing through it, or simply as part of a regular maintenance routine. In this blog post, I'll guide you through the process of replacing the ball in an IBC DN50 Welded Ball Valve, ensuring that you can carry out this task safely and effectively.
Understanding the IBC DN50 Welded Ball Valve
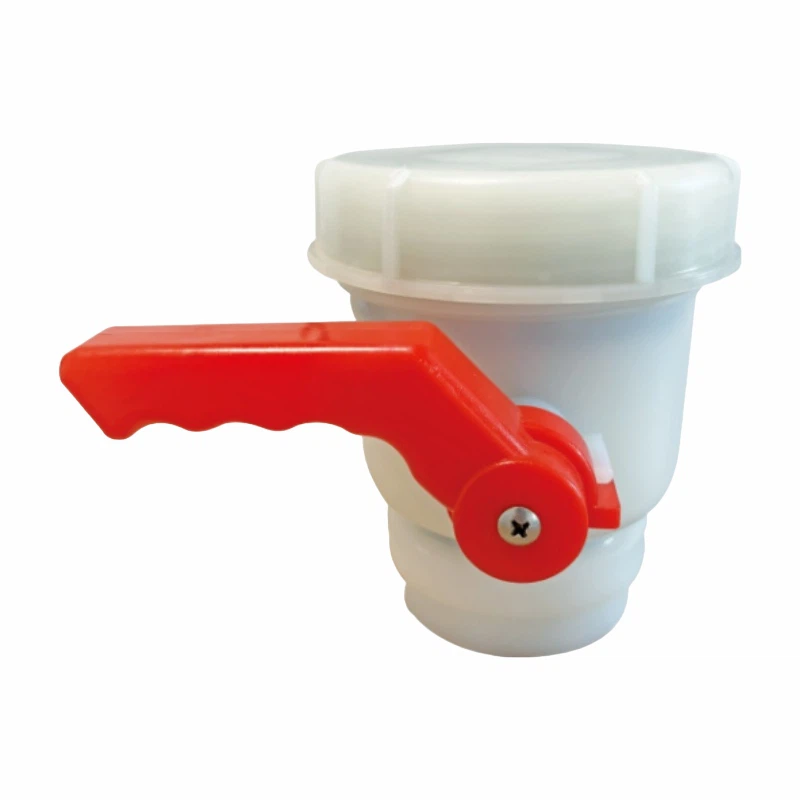
Before we dive into the replacement process, let's take a moment to understand the IBC DN50 Welded Ball Valve. This valve is a crucial component in many industrial applications, especially those involving Intermediate Bulk Containers (IBCs). The DN50 refers to the nominal diameter of the valve, which is 50mm. The welded design ensures a strong and leak - proof connection, making it suitable for handling various liquids and gases. You can find more information about the IBC DN50 Welded Ball Valve on our website.

Tools and Materials Required
To replace the ball in the IBC DN50 Welded Ball Valve, you'll need the following tools and materials:
- Wrench Set: A set of wrenches is essential for removing the valve from the pipeline and disassembling its components. Make sure you have the right sizes to fit the valve's nuts and bolts.
- New Ball: Ensure that the new ball you purchase is compatible with the IBC DN50 Welded Ball Valve. It should have the correct dimensions and be made of a suitable material for your application.
- Sealant: A high - quality sealant is necessary to ensure a proper seal when reassembling the valve. This will prevent leaks and ensure the valve functions correctly.
- Cleaning Supplies: You'll need a brush, cloth, and a suitable cleaning solvent to clean the valve components before reassembly. This helps to remove any debris or contaminants that could affect the valve's performance.
Step - by - Step Guide to Replacing the Ball
Step 1: Shut Off the Flow
Before you start working on the valve, it's crucial to shut off the flow of the liquid or gas in the pipeline. This can be done by closing the upstream and downstream valves. Make sure to relieve any pressure in the valve by opening a small bleed valve, if available. This will prevent any accidental release of the substance during the replacement process.
Step 2: Remove the Valve from the Pipeline
Using the appropriate wrenches, carefully loosen and remove the nuts and bolts that connect the valve to the pipeline. Once the valve is detached, place it on a clean and stable work surface.
Step 3: Disassemble the Valve
Begin by removing the valve cover or bonnet. This is usually held in place by a series of bolts. Carefully remove these bolts and set them aside in a safe place. Once the cover is removed, you'll be able to access the internal components of the valve, including the ball.
Step 4: Remove the Old Ball
Inspect the valve to identify the retaining mechanism for the ball. In most cases, there will be a set of seats or retainers that hold the ball in place. Use the appropriate tools to carefully remove these retainers and lift out the old ball. Be careful not to damage the valve body or the other components during this process.
Step 5: Clean the Valve Components
Take this opportunity to clean all the valve components, including the valve body, seats, and retainers. Use the brush and cleaning solvent to remove any dirt, debris, or corrosion. Wipe the components dry with a clean cloth. This step is crucial as it ensures that the new ball will fit properly and the valve will function smoothly.
Step 6: Install the New Ball
Carefully place the new ball into the valve body, making sure it is properly aligned with the flow path. Reinstall the retainers or seats to hold the ball in place. Make sure that the ball can rotate freely within the valve body.
Step 7: Reassemble the Valve
Apply a thin layer of sealant to the mating surfaces of the valve cover or bonnet. Then, carefully place the cover back on the valve body and reinstall the bolts. Tighten the bolts evenly to ensure a proper seal.
Step 8: Reinstall the Valve in the Pipeline
Once the valve is reassembled, use the wrenches to connect it back to the pipeline. Make sure to tighten the nuts and bolts securely, but be careful not to over - tighten, as this could damage the valve or the pipeline.
Step 9: Test the Valve
After reinstalling the valve, slowly open the upstream valve to allow the flow of the substance into the valve. Check for any leaks around the valve connections and ensure that the valve operates smoothly. If you notice any leaks or abnormal operation, shut off the flow immediately and re - check the installation.
Other Related Products
In addition to the IBC DN50 Welded Ball Valve, we also offer other high - quality valves for IBC applications. For example, the IBC DN80 Welded Ball Valve is suitable for applications where a larger flow rate is required. The IBC Plastic Butterfly Valve is another option, which is lightweight and cost - effective.
Conclusion
Replacing the ball in an IBC DN50 Welded Ball Valve is a task that can be accomplished with the right tools, materials, and knowledge. By following the steps outlined in this guide, you can ensure that your valve is restored to optimal performance. If you have any questions or need further assistance, don't hesitate to contact us. We're here to help you with all your valve needs and can provide you with high - quality products and expert advice. Whether you're looking to replace a ball in an existing valve or purchase a new one, we're your reliable partner. Reach out to us to discuss your specific requirements and start a procurement conversation.
References
- Valve Manufacturer's Manuals
- Industrial Valve Installation and Maintenance Guides


